3. Installing the SDK
- 3.1 Getting started
- 3.2 What is Scratchbox?
- 3.3 Scratchbox components
- 3.4 Prerequisites
- 3.5 Automatic install of Scratchbox
- 3.6 Manual install of Scratchbox
- 3.7 Automatic install of the maemo SDK
- 3.8 Manual install of the maemo SDK
- 3.9 Manual install of the ARMEL target
3. Installing the SDK
3.1 Getting started
This chapter covers the pre-requisites and installation of the development environment. The maemo SDK consists of libraries and tools enabling the development of applications for maemo and Internet Tablets. This SDK must be installed into an development environment called Scratchbox in order for it to be useful.
At this point, you should check the maemo training wiki pages maintained by maemo community. They might contain some information which affects the SDK installation process. Notice that the information in maemo wiki is not verified by Nokia and thus Nokia cannot be responsible of that information.
We'll start by installing Scratchbox first and then proceed by installing the maemo SDK inside Scratchbox. The next chapter covers testing of the installation using simple text and graphical programs.
Installing the SDK can also be done by using automatic installation scripts, using which is covered in the SDK installation instructions (part of the SDK). This material will cover installation in a more step-by-step fashion, so that you may easily create custom Scratchbox targets in the future.
3.2 What is Scratchbox?
Now that you've seen what both Internet Tablet and applications designed for maemo are made of, you might be wondering how to write your own applications. If you've used the various GNU tools before you also might be wondering how all the different versions of tools and libraries are handled during development.
Enter Scratchbox, a specially packaged "sandbox" environment which provides the necessary tools and also isolates your development efforts from your real Linux system. Scratchbox also makes it easy to do cross compiling which means building your software into a binary format that is executable in your target device.
The name "Scratchbox" comes from "Linux from scratch" + "chroot jail" (sandbox). This also tells you something about its implementation and intended use. While working inside Scratchbox, you'll be running programs in a changed root environment (chroot). In Linux systems it's possible to change the part of file paths that a process will see. Scratchbox uses this mechanism on start to switch its root directory (/) to something else than the real root. This is part of the isolation technique used. Because of this, the environment is called a sandbox, a private area where you can play around without disturbing the environment and without all the mess that real sand would cause. The other parts of the isolation technique are library call diversions (using LD_PRELOAD), wrapping of compiler executables and other commands.
Scratchbox:
- Is a software package to implement development sandboxes (for isolation)
- Contains easy to use tools to assist cross-compilation
- Supports multiple developers using the same development system (not covered in this material).
- Supports multiple configurations for each developer.
- Supports executing target executables on the hardware target, via a mechanism called
sbrsh(not covered in this material). - Supports running non-native binaries on the host system via instruction set emulators (Qemu is used).
Beside these main features, it's possible to develop your own software packages that can be installed and used inside a Scratchbox environment. Scratchbox also includes some integration for Debian package management, so that once we have setup our source files correctly and write a couple of configuration files, we can create binary distribution packages for various architectures (similar to .msi-files in Windows, or .rpm-files in Fedora Core, RHEL and SUSE). These tools are also used to provide the environment with a packaging database so that we can install other development packages over the Internet when we need them (by using standard Debian package management tools).
The Internet Tablet also uses a similar packaging system, and this means that packages built using Scratchbox and the SDK can be installed on the real device.
Scratchbox is licensed under the GPL and it's open for outside contributions. For an in depth coverage on Scratchbox capabilities please see scratchbox.org.
In this material we'll be using only the Scratchbox capabilities that are necessary to use the maemo SDK.
3.3 Scratchbox components
Before installing Scratchbox, we need to cover some terminology that it uses in its documentation. For most of the time Scratchbox will be abbreviated as sbox from now on.Scratchbox terminology:
- core package
- package that contains the core tools implementing sbox. These also include a host compiler (gcc) that can be used to build additional tools for sbox.
- libs package
- contains the necessary libraries for the core to operate.
- devkit
- a package for sbox that contains additional development tools. We'll be interested in 4 devkits (listed later).
- toolchain
- compilers, linkers and tools for a specific target. We'll be needing two, but we'll use the x86-one for now.
- target
- the active toolchain and configuration we're using currently. A target uses a selected toolchain and contains a filesystem to use and related configuration. You can have multiple targets, even if they all use the same toolchains. This makes it easy to try something different, or start a parallel target to test things from scratch.
- Note that an sbox target doesn't technically mean the same thing as the physical target device you might have (Internet Tablet).
- rootstrap
- a target root filesystem image that can be used as a basis for further development. Rootstraps normally contain the necessary files for some specific development target, but sometimes only act as a starting point for the target. There is a rootstrap for developing applications for maemo, and we'll refer to it with "maemo SDK" for the rest of the material. The maemo SDK rootstrap is also slightly special in that one normally will also run
apt-getto install the "rest of" the SDK after extracting the base rootstrap.
3.4 Prerequisites
Before continuing, the installation instructions of the maemo SDK should be reviewed.
There is a special feature that the kernel needs to support in order for the instruction emulator in sbox to work properly. This is the binfmt_misc-feature. It is normally built as a module, so verify that it is loaded in Linux (no root access needed for this):
user@system:~$ lsmod | grep binfmt
binfmt_misc 12936 0
If you do not see a line of output, attempt to do a modprobe binfmt_misc as root (or with sudo). If this still does not work, you will have to find the module somewhere, or even recompile the kernel. On most Debian-based systems (Debian, Ubuntu), the module is included, so there should not be any problems, unless you have built your own kernel. It is also possible that the feature has been built inside the kernel directly, instead of a module.
Also a pseudo X server should be installed to act as an X client to the real system. It will be necessary to run the applications that are developed, after installing the SDK.
There are a few options for this purpose, but this material will cover the usage of Xephyr. Xephyr is a Kdrive-based X server/client that can emulate 16-color depth for its clients even if it is acting as a client to an 24-bit depth real X server. It also implements modern X protocol extensions.
The concept of having a program that is both X server and a client may seem weird. However, there is no reason to worry, as it is a tested technology and works quite well. If, on the other hand, it does not make any sense, revisit the X Window System introduction in the previous chapter.
To install Xephyr:
- Issue the command
sudo apt-get install xserver-xephyron your real Linux system. - Verify installation status by issuing the command
dpkg -l | grep xephyr(as non-root).
3.5 Automatic install of Scratchbox
Up-to-date installation instructions can be found from maemo.org with instructions for each maemo SDK Release.The preferred way to install the Scratchbox is to use the automated installation script. Manual installation of the Scratchbox is described here for educational purposes, and for situations where the automatic installation script fails.
Quick installation of Scratchbox on a Debian system with the automated install-script:
user@system:~$ sudo sh ./maemo-scratchbox-install_X.X.sh -u user
The -u user option is used, so that Scratchbox will add the user account "user" automatically into the group that is allowed to use Scratchbox.
3.6 Manual install of Scratchbox
Scratchbox can also be installed manually. The Debian packages (for the real Linux system) are located at scratchbox.org. Apophis is the release of Scratchbox that is suited to be used with maemo 4.x SDK. Please refer to the Scratchbox documentation for further instructions scratchbox.org.3.7 Automatic install of the maemo SDK
Up-to-date installation instructions can be found from maemo.org, with instructions for each maemo SDK Release.The preferred way to install the the maemo SDK is to use the automated installation script. In some cases, using a manual process is more suitable; this is covered later. Installing the SDK in an offline environment is officially unsupported, but possible as well.
Quick installation with automated install-script:
user@system:~$ sh maemo-sdk-install_X.X.sh
Running this script will display the end user license agreement. Pressing Enter key to accept the license presents you with package selection dialog.
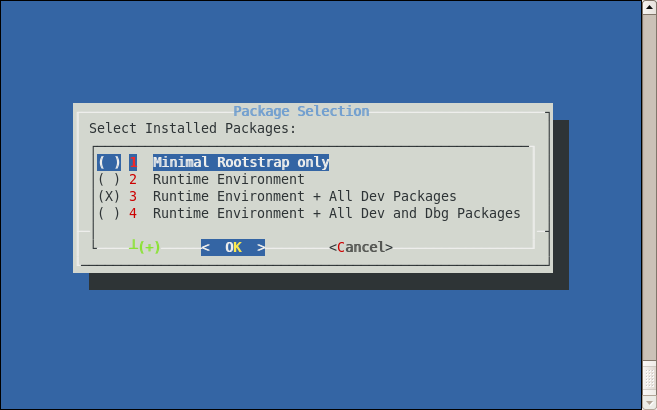
You are presented with four options of installing SDK:
- Minimal Rootstrap only. Choose this only if you are going to install all packages you need from repository.
- Runtime Environment. Use this to install and run software inside Scratchbox. Cannot be used for building software.
- Runtime Environment + All Dev Packages. Choose this to get a full development environment.
- Runtime Environment + All Dev and Dbg Packages. You will get a full development environment plus debug symbols for many system components.
By default, option 3 is selected.
N.B: The SDK installer will always download and install the minimal rootstrap, but will install additional packages using apt-get based on your choice.
In the next dialog, you can choose to install closed Nokia binaries or not.
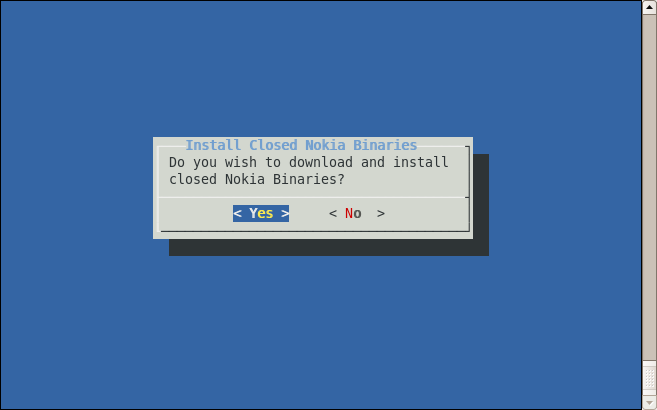
Selecting 'yes' will run the Nokia binaries installer script which will display the EUSA(End User Software Agreement). If you accept the agreement, the installer script will extract the Nokia binaries into a folder under the user's home directory inside scratchbox. It will also configure the /etc/apt/sources.list file in the scratchbox targets to make this 'local repository' visible to the Debian apt tools.
In the next dialog, a summary of your selections so far and the default settings are listed.
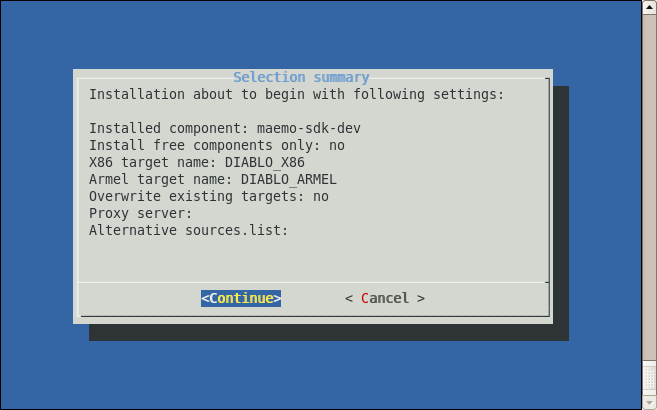
Selecting 'Continue' will initiate the SDK installation process. If the selection summary is not OK, you can cancel the process and re-start the SDK installation script.
After it's successful execution, you will have 2 scratchbox targets ready for use:
DIABLO_X86: Suitable for software development and testing.DIABLO_ARMEL: Suitable for building software for the ARM architecture.
The Nokia binaries are not installed by default but just made available. If you wish to install all of them , then execute the following command inside the scratchbox targets:
[sbox-DIABLO_<target>: ~] > fakeroot apt-get install maemo-explicit
N.B. The installer script by default will prompt the user to install the Nokia binaries, which are not open source. To disable this feature, please use -f command line parameter for the script. For more options, use the command line help option.
user@system:~$ sh maemo-sdk-install_X.X.sh --help
3.8 Manual install of the maemo SDK
In order to install the maemo SDK manually, the first step is to download the necessary rootstrap files. There will be two: one for the X86 target, and the other one for the ARM target.The rootstrap files are available in the same location as the automatic install scripts (for maemo 4.1 SDK they can be found at maemo.org).
It is necessary to download the minimal rootstraps for i386 and arm, so the filenames will be as follows:
- i386/maemo-sdk-rootstrap_4.1_i386.tgz for the X86 version
- armel/maemo-sdk-rootstrap_4.1_armel.tgz for the ARMEL version
For other versions of the SDK, the exact path names above will need to be adjusted (please consult the SDK installation instructions).
Do not extract the downloaded files. They have to be moved under a location where Scratchbox setup tools can find them (/scratchbox/packages/):
user@system:~$ sudo mv /tmp/download-location/maemo-sdk-rootstrap*  \
 /scratchbox/packages/
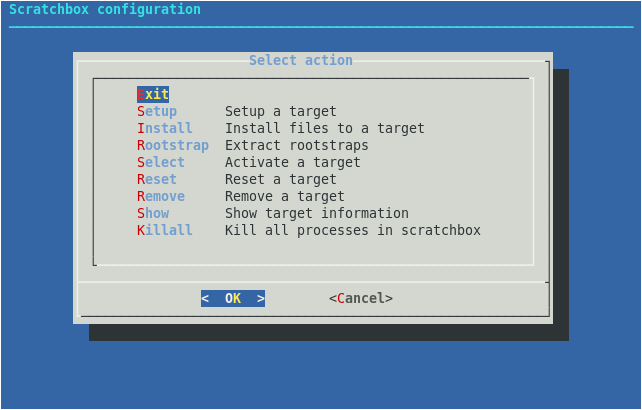
You are now ready to setup your first sbox target. Scratchbox comes with a simple menu-driven tool (sb-menu), which can be used for this. The other option would be using a command line driver tool (sb-conf), but using the menu driver tool is easier.
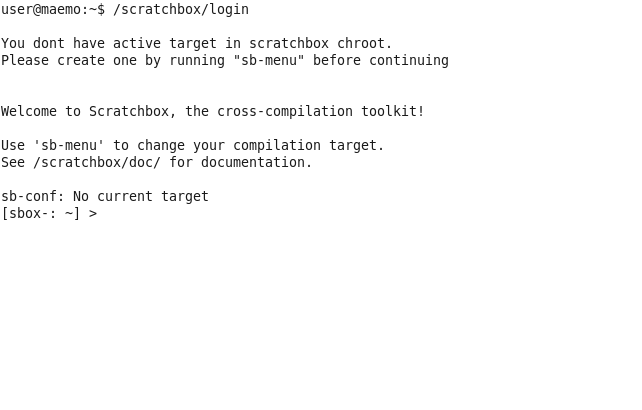
The first step is to log in on the Scratchbox environment:
By default, Scratchbox will activate the same target that was used previously, but since this is the first time Scratchbox is used, there is no target to activate. One can be built with sb-menu:
- Type sb-menu inside Scratchbox to launch the tool.
[sbox-: ~] > sb-menu
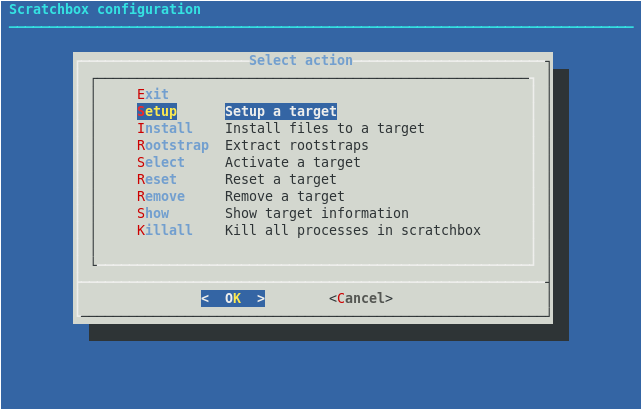
- Select "Setup" in order to create a new target.
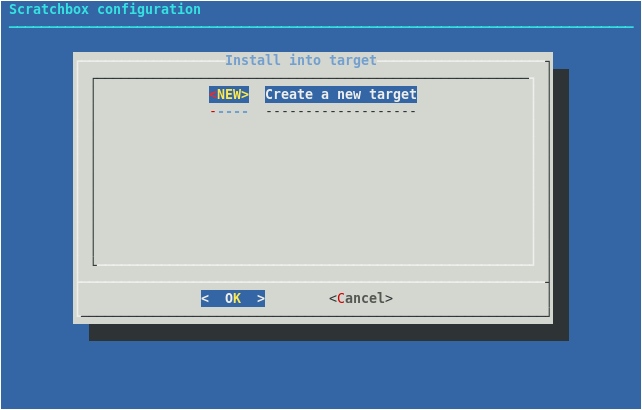
Normally the tool would display all configured targets in a list, but since there are none, the dialog is empty. Select "NEW" in order to create a new target.
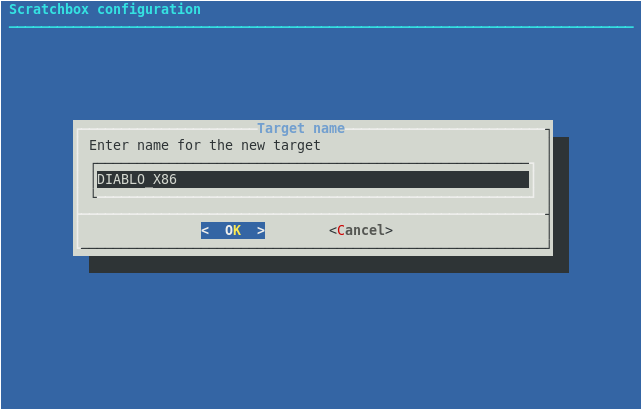
- Using the same names as the automatic install script uses allows you to use the Nokia binaries installer later. Type DIABLO_X86 as the target name.
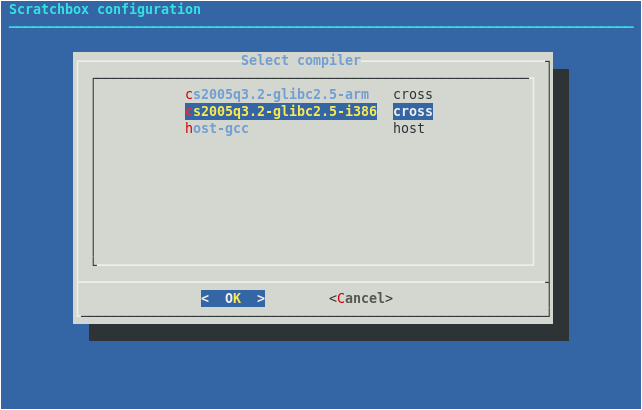
- Since the first target will be for X86 environment, select the i386 compiler version (
cs2005q3.2-glibc2.5-i386).
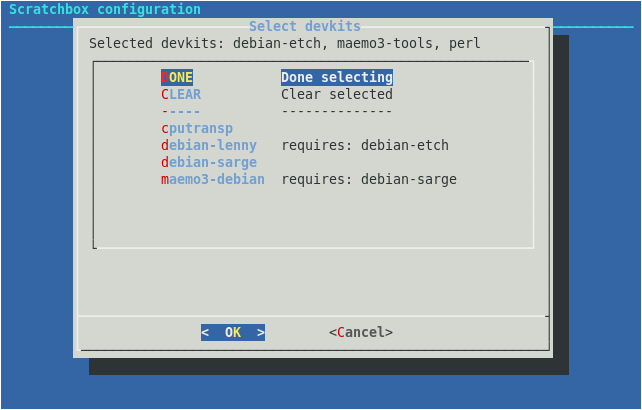
- Next, you will need to select all the devkit packages that you want to enable for the new target. You will need
debian-etch,maemo3-toolsandperl. Do not select cputransp for the X86 target. Select each of them in a row and then press "DONE".
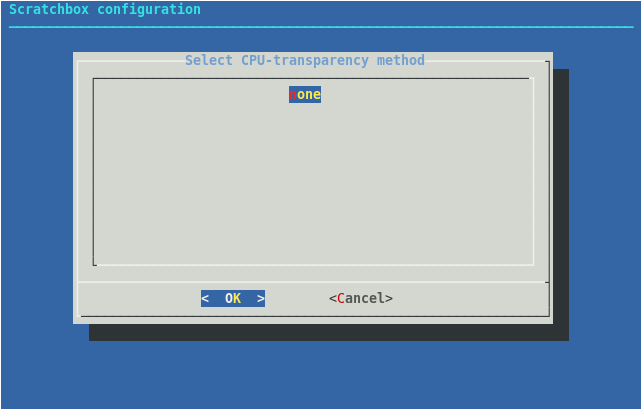
- Since the cputransp devkit was not selected in the previous step, selecting the CPU transparency becomes "none".
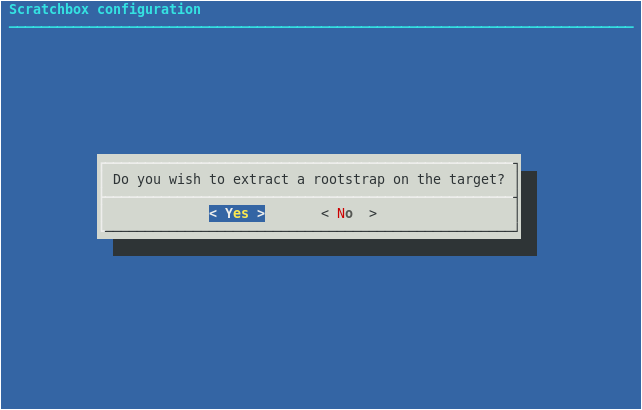
- This concludes the target-specific tool choices, but there are still things to do. The next step is to select a rootstrap package to extract into the target (select "Yes").
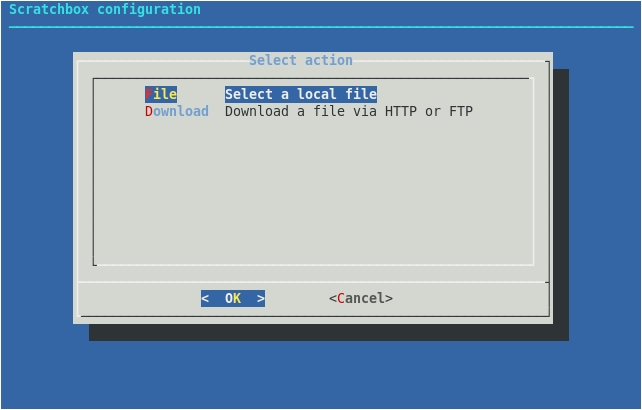
- And since the rootstraps were already downloaded and copied to the proper location, select "File".
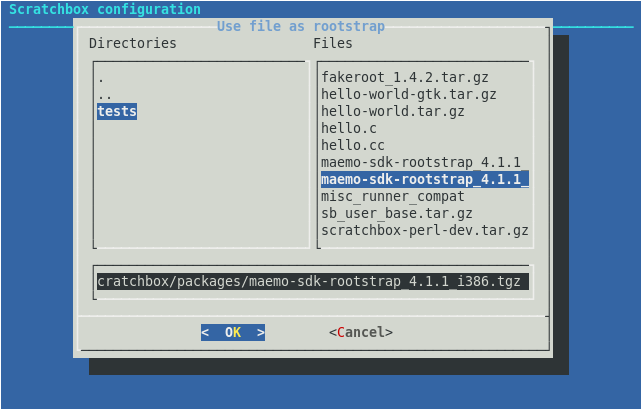
- Using TAB arrows, navigate to the proper rootstrap file (the one that ends with i386), and select it by pressing SPACE and then press ENTER to go forward.
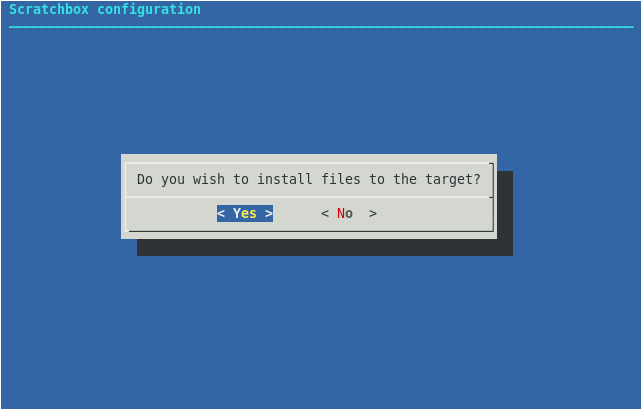
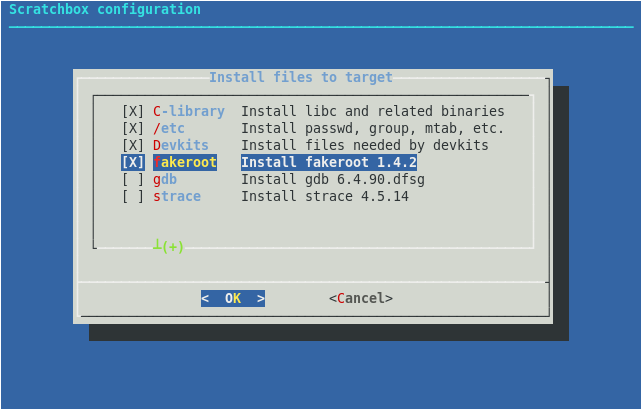
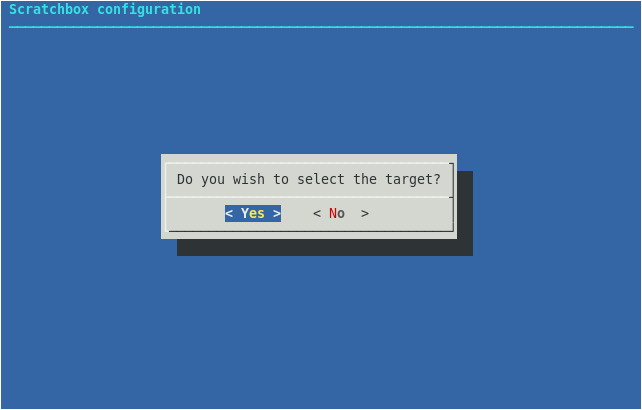
- Unpacking the rootstrap will not take long, and soon after that, a dialog will come up with a question about files installation. Select "Yes" (even if it is not entirely obvious what the question means), and then select the
C-library,/etc,Devkitsandfakeroot. Other tools can be installed later from the maemo SDK repository (or local mirror of the repository).
- After extracting the selected files from the rootstrap, the target is now ready. You should next opt to select the target (so that it becomes active and will be default target from now on).
Selecting the target will restart the Scratchbox session and if everything went well, you are now left with a very minimal maemo SDK environment:
Shell restarting...
[sbox-DIABLO_X86: ~] > arch
i686
[sbox-DIABLO_X86: ~] > dpkg -l | grep maemo-repository
ii  maemo-repository       4.1-1               Configuration for maemo repository.
- In order to complete the SDK installation, you will have to fetch the package list and then install the maemo-sdk-dev meta-package. The package depends on a lot of other packages, and all of them will be downloaded into the target. The number of packages is quite significant, so reserve some time for this step. This step will require a working Internet connection (or DNS redirection into a local copy of the repository).
[sbox-DIABLO_X86: ~] > apt-get update
[sbox-DIABLO_X86: ~] > fakeroot apt-get install maemo-sdk-dev
Using fakeroot is important in the above command so that the package install scripts think that they are running as the root user. Otherwise the installation phase will fail with errors. Modern Debian-style repositories are signed with GPG keys in order to prevent tampering with the repository contents. The maemo repositories, however, do not use this convention, and this makes
apt-getslightly concerned. This can be ignored by accepting installation of unverified packages. - The closed Nokia binaries can be obtained by running the script maemo-sdk-nokia-binaries_X.X.sh. If you choose to accept the EUSA, then proceed to the following step.
- You can install all the nokia binaries in your targets by installing the meta package 'maemo-explicit'.
After apt-get finishes installing all the packages, the SDK installation is ready.
When you are finished with sbox, you need to logout. This is done by terminating the command shell with the exit command, or by using logout.
3.9 Manual install of the ARMEL target
If the X86 target was installed manually (above), it is advisable to create the ARMEL target to enable building software for the Internet Tablets. This step can also be postponed until the need to perform cross-building for Internet Tablets arises.If the automatic install process was used, the ARMEL target is already available (as DIABLO_ARMEL), and the following steps are not necessary.
Creating the ARMEL target requires creating a new target in Scratchbox, using the same steps that were taken for the X86 target.
Here is how the ARMEL target install process differs from the X86 (described above):
- Stop any processes you may have running on the X86 sbox target (sb-conf killall)
- Then start sb-menu as you did with the X86 target:
- Name your target DIABLO_ARMEL (for compatibility)
- You will need to select the arm version of the compiler.
- You will need to select the cputransp devkit and then select qemu-arm-0.8.2-sb2 as the CPU transparency method (instead of none, as used for X86).
- You will need to select the arm version of the maemo SDK base rootstrap.
The apt-get command remains exactly the same, as do all of the other steps.
You may wish to verify the target by using the steps below ("Testing Scratchbox"), at least build the hello world program and verify the architecture of the resulting executable with file command.
Improve this page


